
Star Stacking with Sequator
In my last blog post, I discussed the benefits of photo stacking. This week I wanted to run through one of the techniques I use to stack.
I’ll be starting with the automatic technique. Since I’m a PC user, I use the program “Sequator”. Similar programs exist for Apple users, for example “Starry Sky Stacker”. Note that these programs are specifically designed for stacking astrophotography, with Sequator also being designed to handle images with foregrounds. I’ll be using the images I took at Kilcunda Bridge (Victoria, Australia) and I’ll be taking you through my whole process.
On the night, I took 13 images in total for this one composition. The first 10 images were simply images of the night sky. These were shot at 10s, f1.8 on a Sigma 14mm Art lens using my Nikon D850 and a Sirui tripod. The final 3 images were taken with the same settings, however I used a soft torch light to illuminate segments of the bridge for 2-3s at a time.
My first step in the stacking process is to do some very basic edits in Camera Raw (or Lightroom / Luminar), which can be found with Photoshop. In this particular image I did some temperature adjustment to cool the image down a bit, bumped up the whites and highlights a touch and added a small amount of dehaze. I left the lens distortion on deliberately as I find Sequator does a good job of stacking and correcting for the lens distortion. I also made sure there was no noise reduction applied and removed any sharpening (which is usually set at 40 by Camera Raw). Selecting all images and syncing the settings, I then saved them all as .tif files in a separate folder so that I could find them easily later.
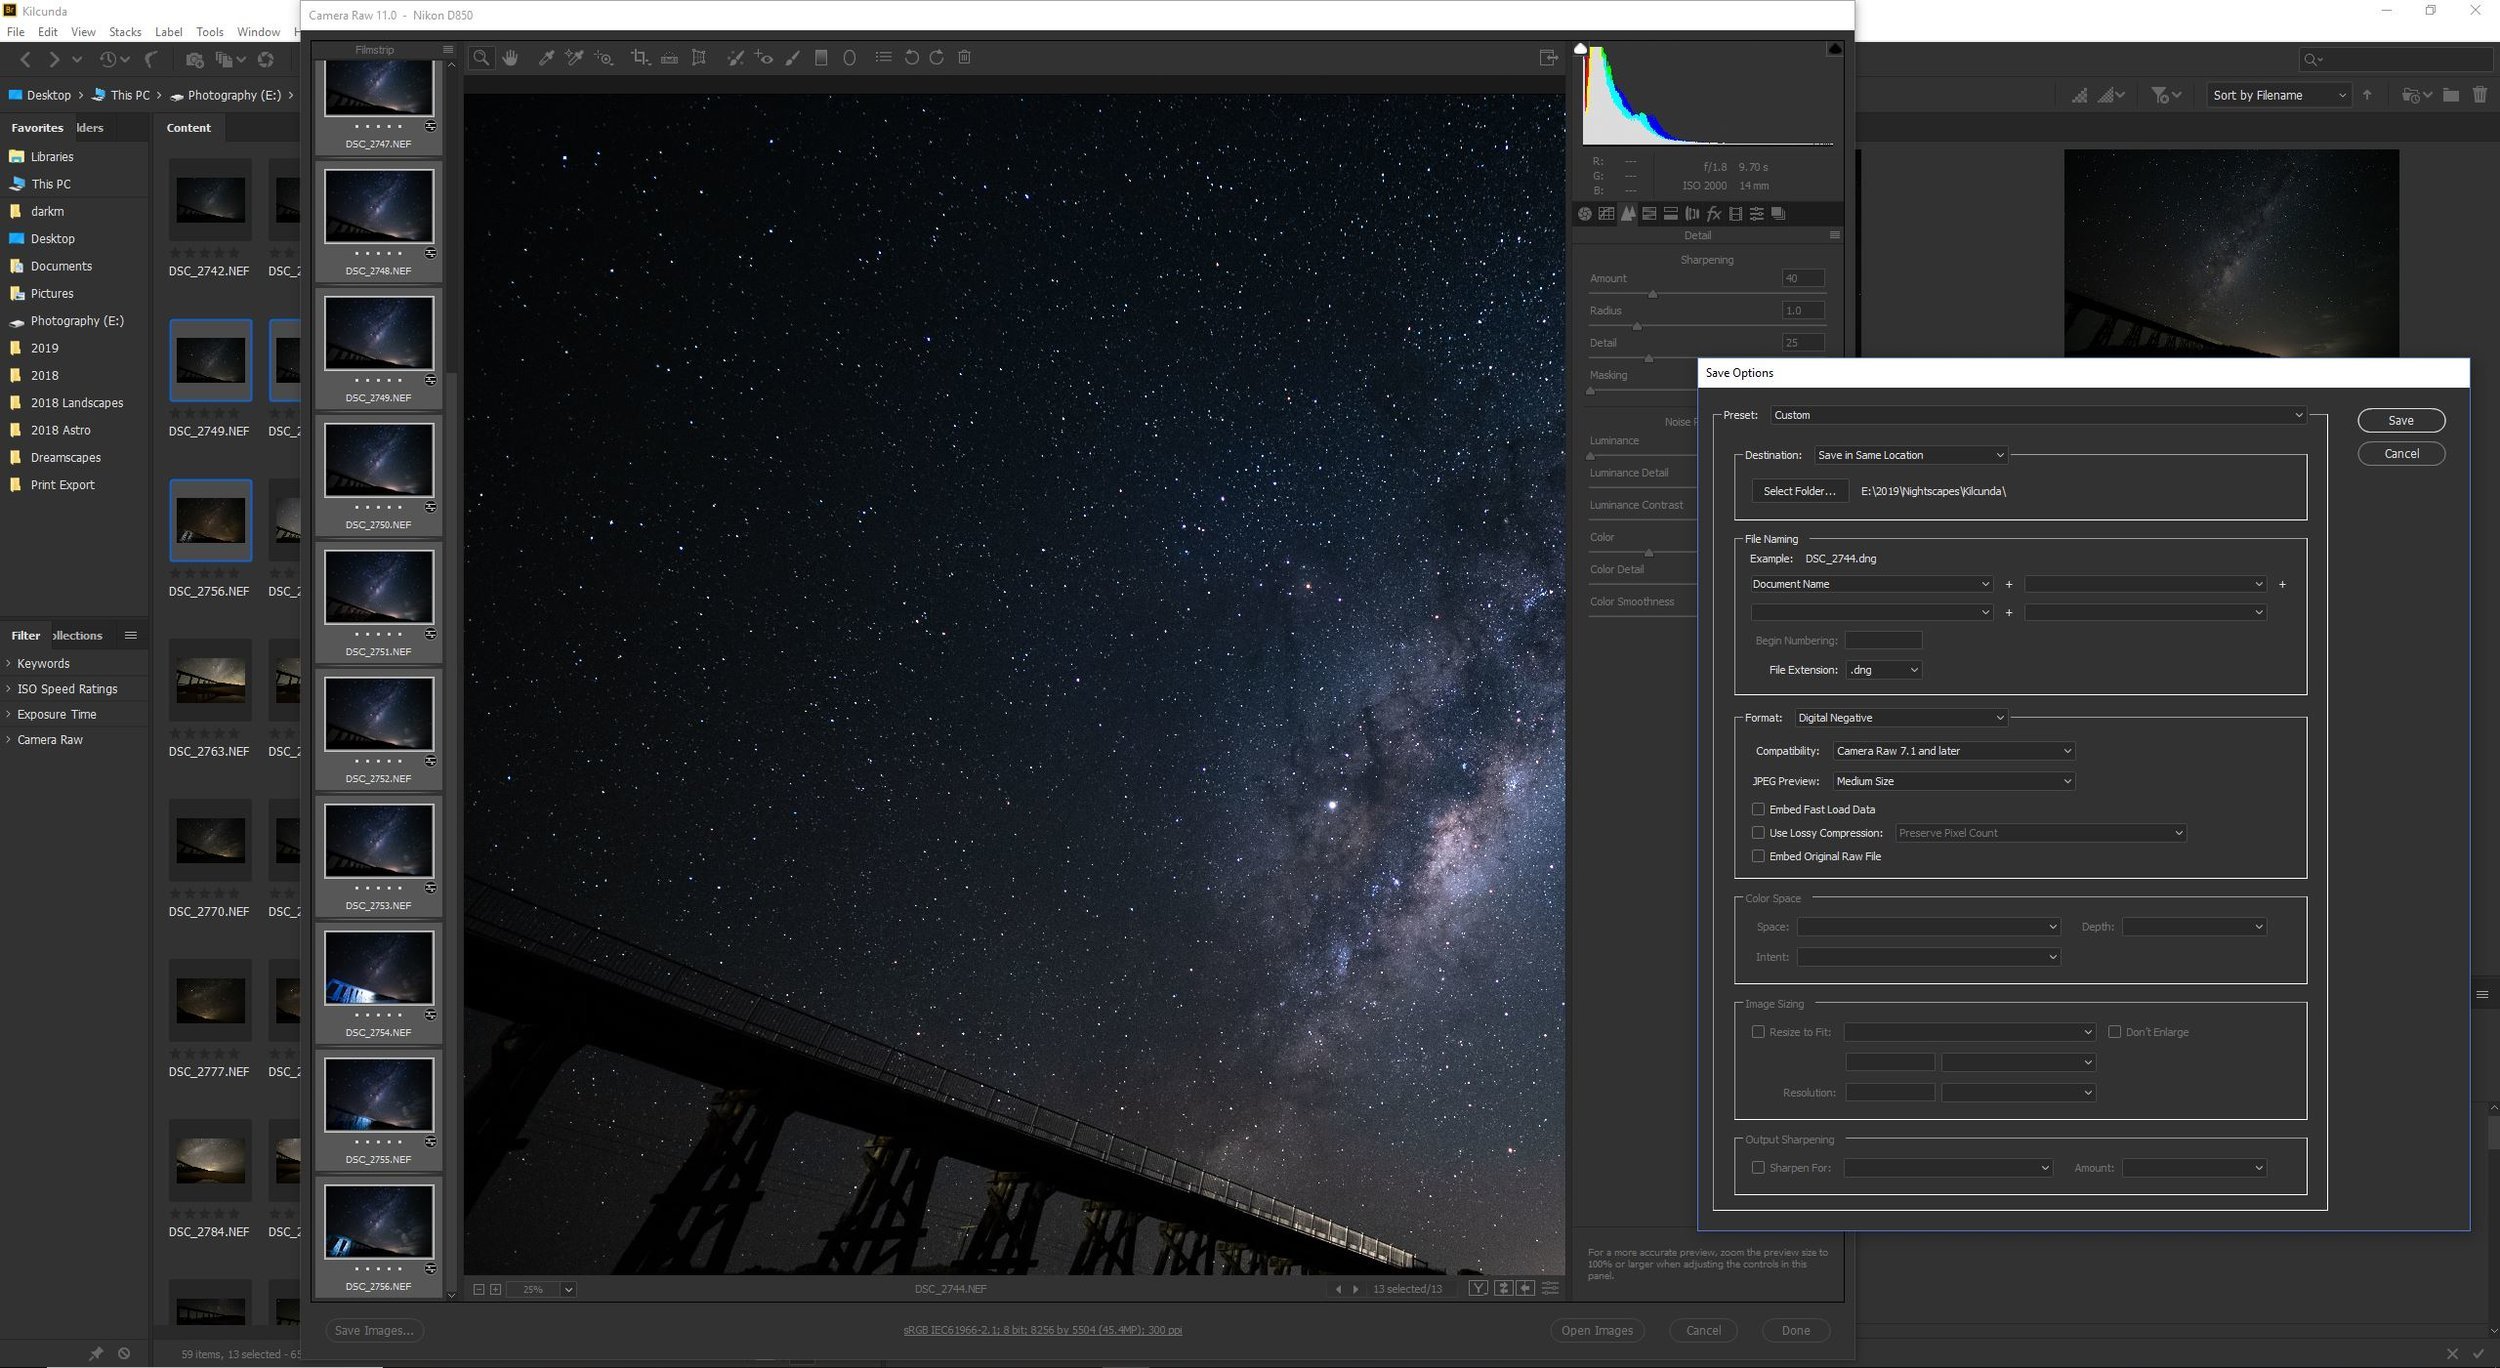
My images post basic Camera Raw adjustment. All settings have been sync’d and the files saved as .tif
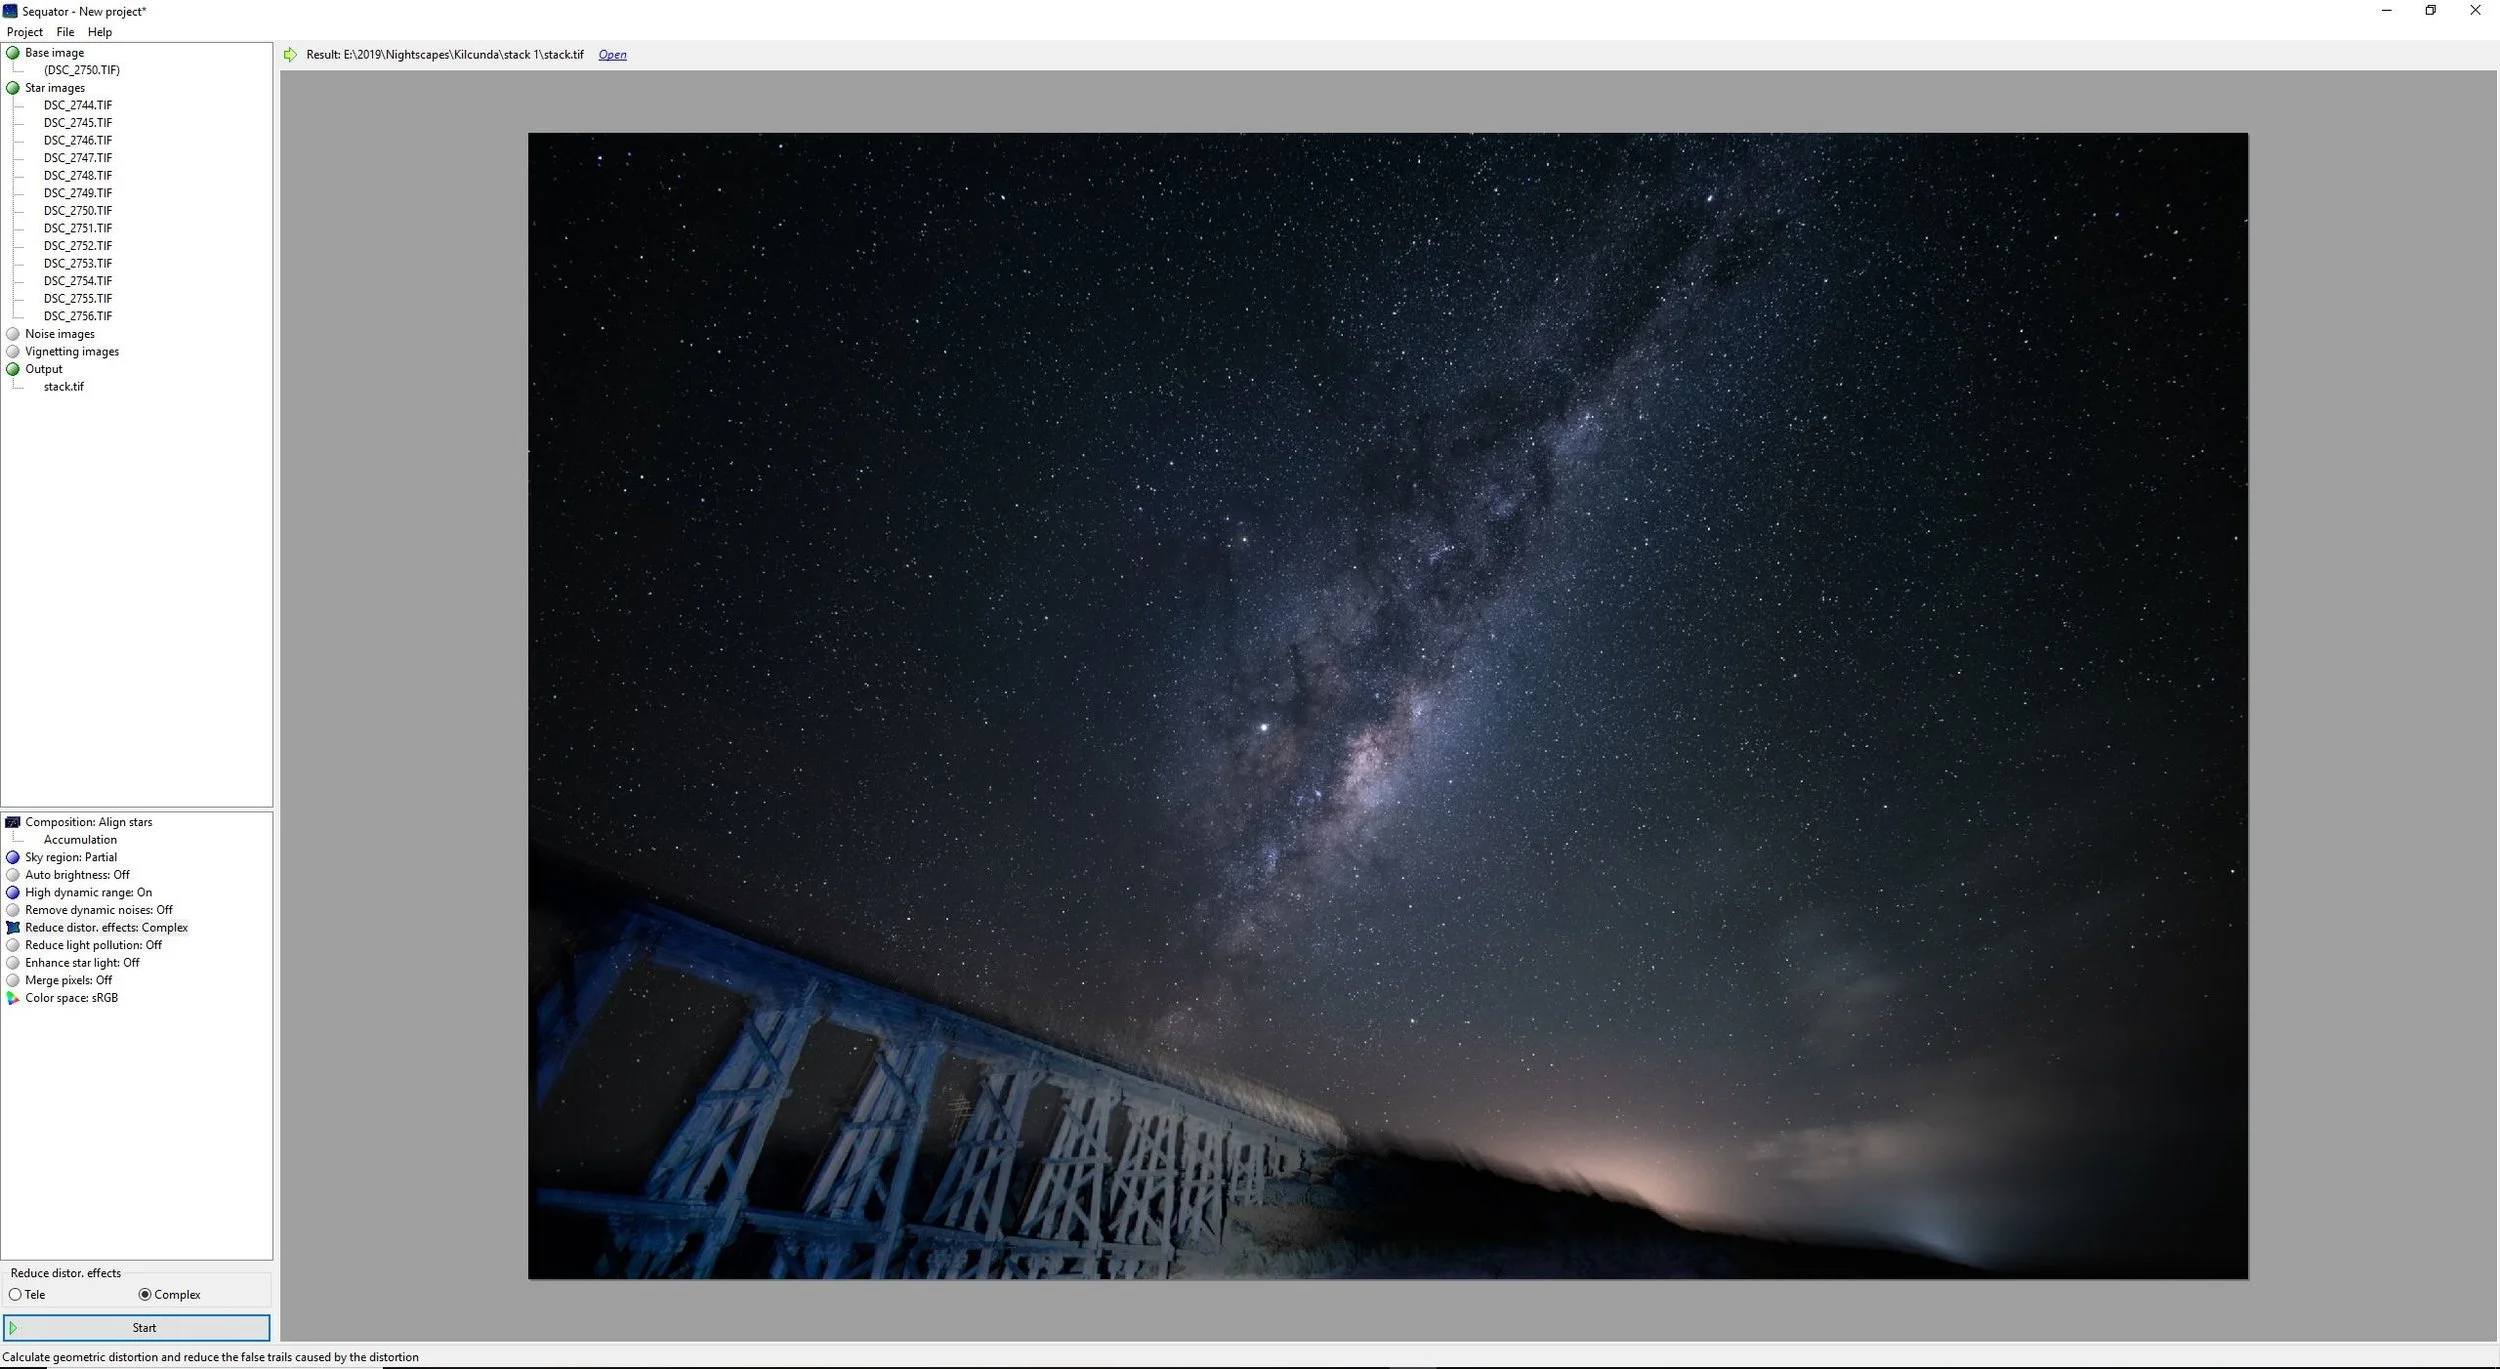
The next step is to load up Sequator. To start, I click on the “Star Images” tab in the top left corner, and load up all 13 images. You can chose a “Base Image” first if you want to – that is the image that Sequator will stack the rest of the images to, however if you don’t choose one and just load the star images, Sequator will automatically choose the middle image for you, which works out just fine in this instance.

The basic Sequator screen. Loading images is done via the options in the top left corner
Noise and vignetting images can then be loaded. Noise images are also known as dark frames (see my previous blog post) and are taken by shooting with the exact same settings but the lens cap on. Usually I would take 6-8 shots if I’m adding noise images and I shoot these immediately after my star shots so that my sensor is roughly the same temperature. I also find the dark frames help to break up my shoots so that I can easily find stacks when loading the images onto my computer.
The output option is essentially a “save as” setting.

Here I have loaded my 13 images with basic adjustment directly into the “Star Images” section and allowed Sequator to chose my base image for me
Next, you need to specify which segment of the image is foreground vs sky. To do this, first click on the “Composition” segment of Sequator. These options allow you to specify whether you want Sequator to stack for star trails (“Trails”), just for sky stacking (“Align Stars”) or for stacking of the sky and foreground. If you want just the sky stacked, choose “Accumulation” or if you want the program to stack the sky and foreground choose “Freeze Ground”. If there have been a lot of extra distractions in your image that you want to have removed, such as plane/helicopter light trails or shooting stars, then click on the “select best pixels” option for sky stacking or if you are stacking sky and ground, click on “freeze ground” and then “selective”. Finally, if you want to manually stack the images using a program like Photoshop, and would just like the aligned tif files so that you don’t need to align them manually, then you can choose the “Align only” option which will output aligned tif files for you to import into your post processing software. You generally want to have the “Linear” option ticked if you are doing this.
I’ll show both the “Align stars, Accumulation” option and the “Freeze Ground” option in my examples in this tutorial.
Click on the next option down, “Sky Region” and choose the best method of masking the sky in. I usually just pick “Irregular Mask” and then paint on the mask over the sky. Left clicking will add to the mask (shown in green) and right clicking will subtract from it. To increase or decrease your brush size, use your mouse wheel.

Painting on my mask for the sky region. The selected area is highlighted with a green mask.
From here, it’s a matter of choosing which settings you want and clicking “Start”. The most important setting for me is the “Reduce distor. effects” as I’m using an ultra wide angle lens and I have some distortion. Without this setting applied, the program doesn’t handle the stacking very well and I get a lot of blur on my stars. Click on this setting and choose the “complex” setting for ultra wide lenses and “telephoto” for zoom lenses.
The rest of the settings you can play around with to see what gives you the best effect, but I generally find that I don’t need most of them as I’ll be using Photoshop afterwards to apply a few more tone/curve adjustments. In brief:
- Auto brightness will adjust the brightness levels in your image. I usually turn it off by default, but if you find that your output image is too bright and has blown out highlights, try turning this on. Generally however, I find it easier to adjust the exposure and highlights prior to importing my images, as I described at the start of this tutorial, as the auto brightness often doesn’t do a great job.
- High dynamic range does what the name implies and can be useful for some images. Again, I usually find it better to do your own adjustments pre/post.
- Remove dynamic noises will attempt to remove hot pixels. Generally only useful if you have very long exposures that result in bright randomly coloured pixels and if you’re not using dark images
- Reduce light pollution is meant to remove some of the negative effects of horizon light pollution from towns/cities etc. I’ve found that Sequator does a fairly poor job with this setting and keep this setting off by default. Generally speaking, you’ll be better off adjusting light pollution effects manually in lightroom/photoshop
- Enhance starlight is meant to increase the brightness of just your stars a bit so that they stand out more. Again, I find this setting to be better kept off with manual adjustment a much better option post stacking.
- Merge pixels will help to increase the sensitivity of Sequators aligning/stacking process, however it will drastically reduce your image size and unless I’m doing huge panoramas I keep this off.
- Color space lets you choose between sRGB, RGB and Linear. Most of the time you would keep this on sRBG.

Click on start and let Sequator do it’s magic
Once you have chosen your desired settings, click on start and wait for the final output. This can then be imported into your desired editing program to apply any finishing touches. The following images show a sky only stack with blurred foreground, a stacked ground and sky photo and comparison photos showing the difference that stacking has made on my photo noise control.
Final image with the sky stacked only. Note the blurred foreground will need to be adjusted manually in Photoshop later

Final image with the ground also stacked. Some detail is lost in the ground as the exposure is decreased a bit from the original images, but this can be corrected later in Photoshop. Note how the stacked cloud images also add to the smooth long exposure effect you may see with exposures longer than 10s

A comparison of the post (left) and pre (right) images, zoomed in 50%. Note how much less noise there is in the left image (the stacked image) compared to the right image

A comparison of the post (left) and pre (right) images, zoomed in 50% to show how foreground stacking has reduced noise at the expense of some exposure and minor loss of detail which can be recovered later
Due to the loss of some of the detail/light in the foreground in my final image, my final step was to import my stack into photoshop and merge the bridge with another image I took with some light painting of the foreground. Carefully blending the two together so that just the bridge is unmasked in the non-stacked version, I was able to apply enough noise correction on my unstacked layer to allow it to blend nicely into the stacked layer.
A few colour and brightness adjustments and the addition of a small amount of clarity to my stars only (as clarity will bring back some noise, I added a negligible amount to this image) and my final image is ready:

My final image of the milky-way core over the old Kilcunda railway bridge
I hope this tutorial helped someone with the process of stacking and gave some insight into my workflow. I’ll soon be sharing some tips and tutorials on how to stack manually, and in a future blog post how I plan my daytime and nighttime photoshoots.